UICollectionViewを用いてこんな感じの連続したカレンダーを作ってみました。
決められた日付から現在の月のカレンダーまでを表示しています。
iPhoneに元々入っているカレンダーのように、延々と遡れるタイプではないですが紹介していきます。
UICollectionViewを設置する
カレンダーの日付をUICollectionViewを用いて表示します。
まずはUICollectionViewを設置。
import UIKit

class ViewController: UIViewController ,UICollectionViewDelegate,UICollectionViewDataSource,UICollectionViewDelegateFlowLayout{

    private var myCollectView:UICollectionView!
    //セルの余白
    let cellMargin:CGFloat = 2.0
    //1週間に何日あるか(行数)
    let daysPerWeek:Int = 7

    override func viewDidLoad() {
        super.viewDidLoad()

        let barHeight = UIApplication.shared.statusBarFrame.size.height
        let width = self.view.frame.width
        let height = self.view.frame.height
        let layout = UICollectionViewFlowLayout()
        layout.sectionInset = UIEdgeInsetsMake(0,0,0,0)

        //コレクションビューを設置していくよ
        myCollectView = UICollectionView(frame: self.view.frame, collectionViewLayout: layout)
        myCollectView.frame = CGRect(x:0,y:barHeight + 50,width:width,height:height - barHeight - 50)
        myCollectView.register(CalendarCell.self, forCellWithReuseIdentifier: "collectCell")
        myCollectView.delegate = self
        myCollectView.dataSource = self
        myCollectView.backgroundColor = .white

        self.view.addSubview(myCollectView)
    }

    //セクションの数
    func numberOfSections(in collectionView: UICollectionView) -> Int {
        return 1
    }

    //レイアウト調整 行間余白
    func collectionView(_ collectionView:UICollectionView,layout collectionViewLayout:UICollectionViewLayout,minimumLineSpacingForSectionAt section:Int) -> CGFloat{
        return cellMargin
    }

    //レイアウト調整 列間余白
    func collectionView(_ collectionView:UICollectionView,layout collectionViewLayout:UICollectionViewLayout,minimumInteritemSpacingForSectionAt section:Int) -> CGFloat{
        return cellMargin
    }


    //セルのサイズを設定
    func collectionView(_ collectionView:UICollectionView,layout collectionViewLayout:UICollectionViewLayout,sizeForItemAt indexPath:IndexPath) -> CGSize{
        let numberOfMargin:CGFloat = 8.0
        let width:CGFloat = (collectionView.frame.size.width - cellMargin * numberOfMargin) / CGFloat(daysPerWeek)
        let height:CGFloat = width * 2.0
        return CGSize(width:width,height:height)
    }

    //選択した時
    func collectionView(_ collectionView: UICollectionView, didSelectItemAt indexPath: IndexPath) {

    }

    //セルの総数
    func collectionView(_ collectionView: UICollectionView, numberOfItemsInSection section: Int) -> Int {
        return 10
    }

    //セルの設定
    func collectionView(_ collectionView: UICollectionView, cellForItemAt indexPath: IndexPath) -> UICollectionViewCell {
        let cell:CalendarCell = collectionView.dequeueReusableCell(withReuseIdentifier:"collectCell",for:indexPath as IndexPath) as! CalendarCell


        return cell
    }
}
UICollectionViewの細かいことは割愛します。
UICollectionViewFlowLayoutについては、「【Swift】UICollectionViewFlowLayoutの余白調整について」ちょろっと書いていますのでよかったらどうぞ。
セルの余白とコレクションビューの行数を用意しています。
カスタムセルを作る
上記のままだとCalendarCellというものはないよと言われるので作成します。
File > New > File より
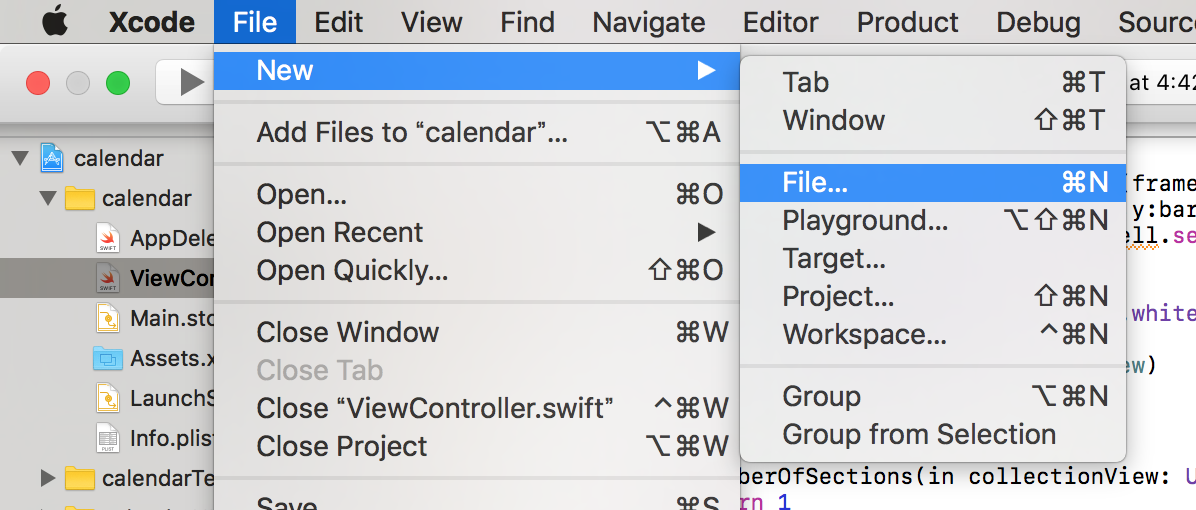
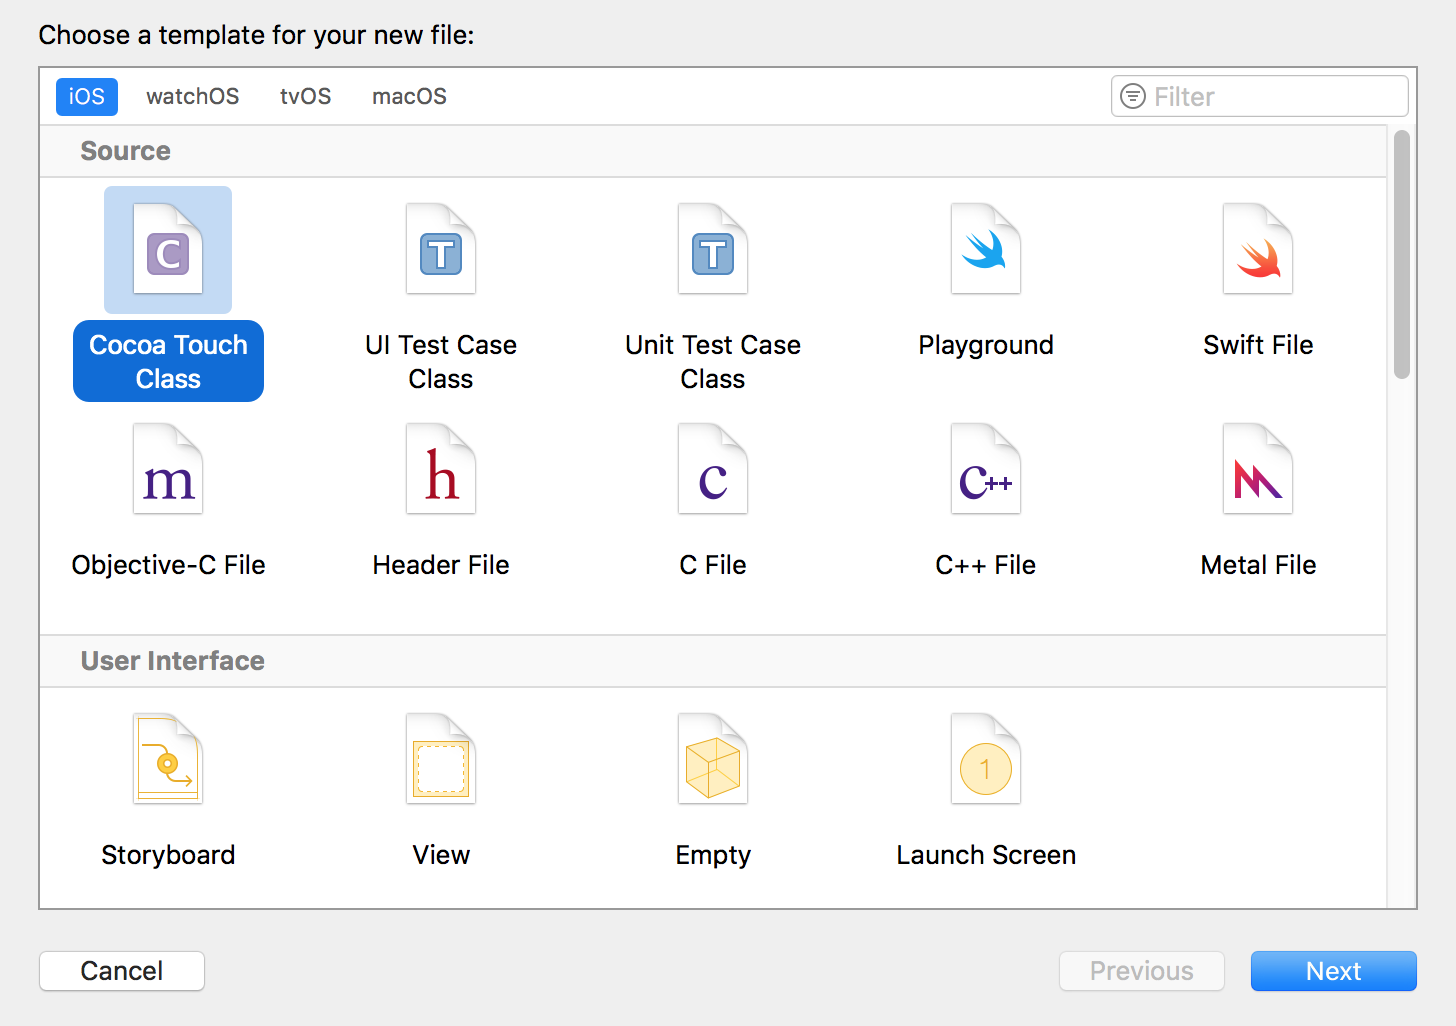
Source > Cocoa Touch Classを選択
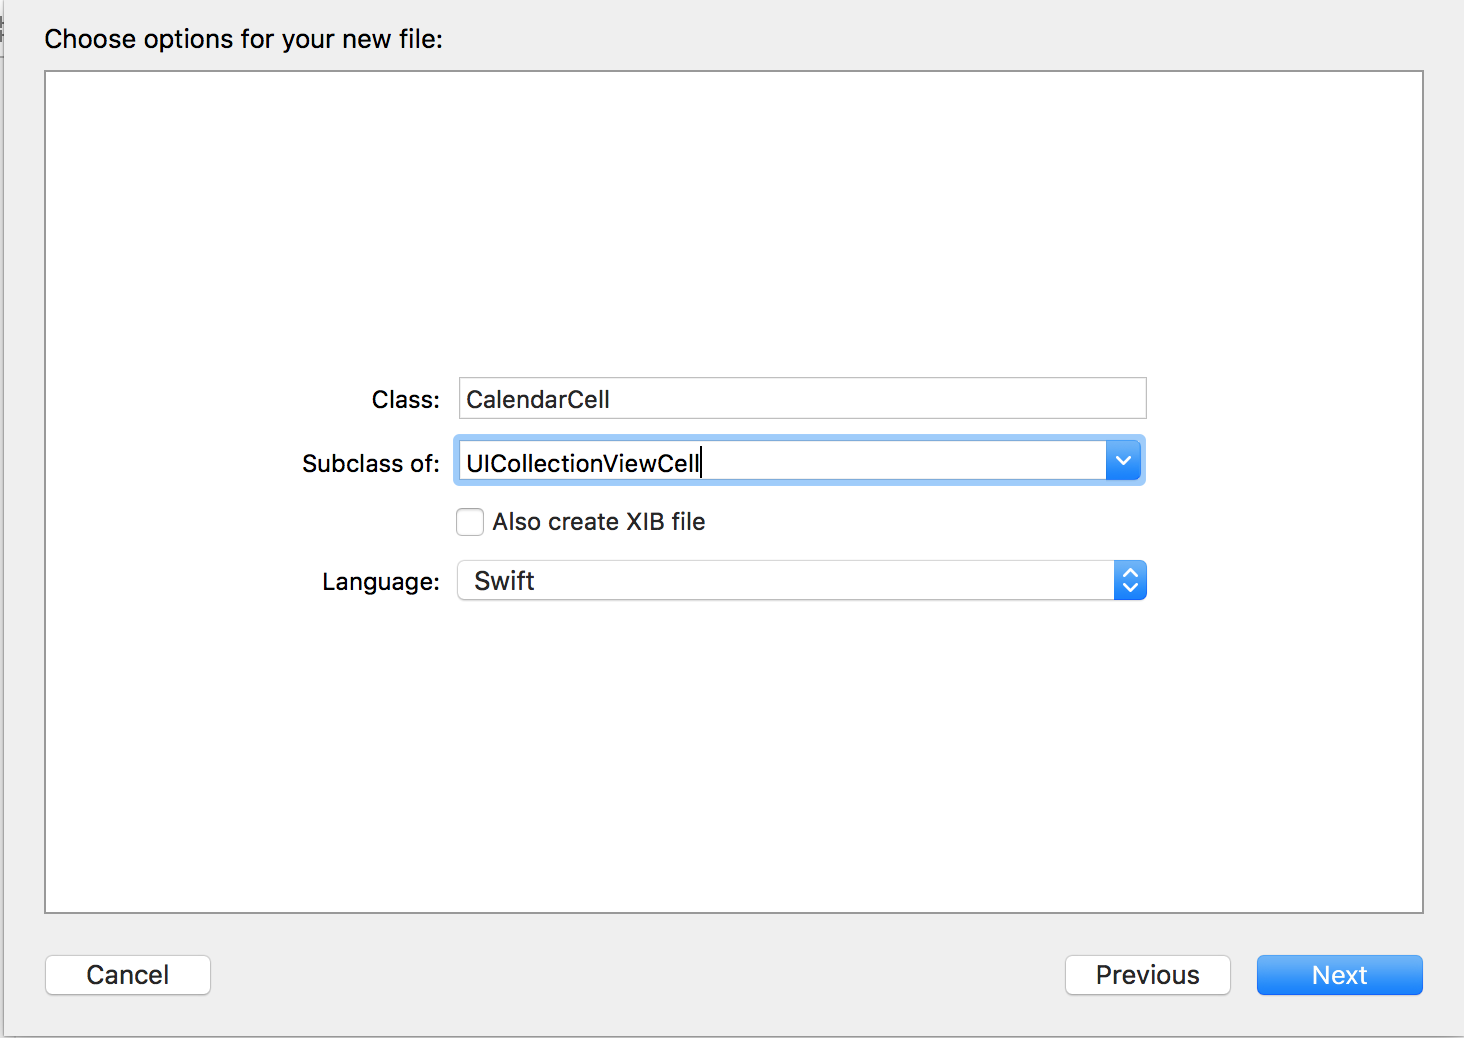
Subclass of:UICollectionViewCellに設定し、CalendarCellを作成
サブクラスがUICollectionViewCellのCalendarCellにラベル等を乗せていきます。
import UIKit

class CalendarCell: UICollectionViewCell {
    public var textLabel:UILabel!

    required init(coder aDecoder:NSCoder){
        super.init(coder: aDecoder)!
    }

    override init(frame:CGRect){
        super.init(frame:frame)

        //UILabelを生成
        textLabel = UILabel()
        textLabel.frame = CGRect(x:0,y:0,width:self.frame.width,height:self.frame.height)
        textLabel.textAlignment = .center
        self.contentView.addSubview(textLabel!)

    }
}
このCalendarCellでとりあえずラベルの位置や、ラベルを置くことを決めています。
とりあえずセルの型を作って置いて、ラベルのテキストは
func collectionView(_ collectionView: UICollectionView, cellForItemAt indexPath: IndexPath) -> UICollectionViewCell {
}
の中で書いていきます。
日付を取得しよう
日付の取得は、NSDateのサブクラスであるDateManagerを作成してそこに書いていきます。
先ほどと同様の手順です。
File > New > File
Source > Cocoa Touch Class
Subclass of :NSDateにしたDateManagerを作成
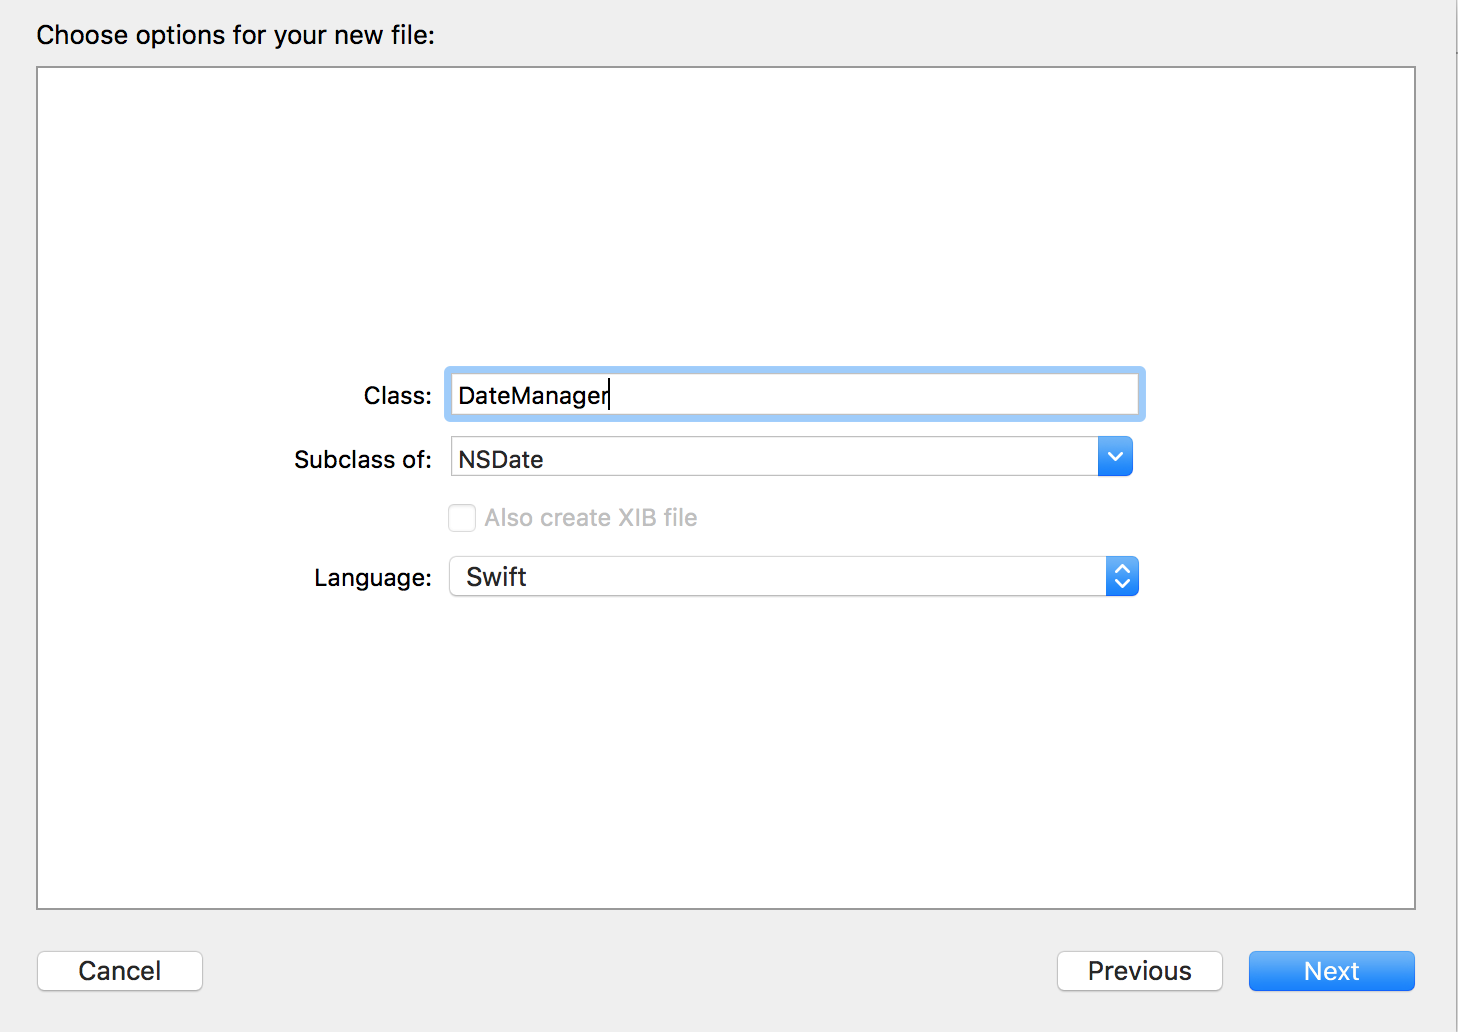
この中に色々メソッドを書いていきます。
とりあえずDateManagerの全体コードから
import UIKit

class DateManager: NSDate {

    //現在の日付
    private var selectedDate = Date()

    //1週間に何日あるか
    private let daysPerWeek:Int = 7

    //セルの個数(nilが入らないようにする)
    private var numberOfItems:Int = 0

    //指定した月から現在の月までのセルの数を返すメソッド
    func cellCount(startDate:Date) -> Int{
        let startDateComponents = NSCalendar.current.dateComponents([.year ,.month], from:startDate)
        let currentDateComponents = NSCalendar.current.dateComponents([.year ,.month], from:selectedDate)
        //作成月と現在の月が違う時はその分表示    components.monthではなれた月分
        let components = NSCalendar.current.dateComponents([.year,.month], from: startDateComponents, to: currentDateComponents)
        let numberOfMonth = components.month! + components.year! * 12

        for i in 0 ..< numberOfMonth + 1{
            let dateComponents = NSDateComponents()
            dateComponents.month = i
            let date = NSCalendar.current.date(byAdding: dateComponents as DateComponents, to: startDate)
            //in(その月)にof(日)が何個あるか
            let dateRange = NSCalendar.current.range(of: .weekOfMonth, in: .month, for: date!)
            //月の初日が何曜日かを取得 日曜日==1
            let ordinalityOfFirstDay = NSCalendar.current.ordinality(of: .day, in: .weekOfMonth, for: firstDateOfMonth(date:date!))
            if(ordinalityOfFirstDay == 1 || i == 0){
                numberOfItems = numberOfItems + dateRange!.count * daysPerWeek
            }else{
                numberOfItems = numberOfItems + (dateRange!.count - 1) * daysPerWeek
            }
        }
        return numberOfItems
    }


    //指定された月の初日を取得
    func firstDateOfMonth(date:Date) -> Date{
        var components = NSCalendar.current.dateComponents([.year ,.month, .day], from:date)
        components.day = 1
        let firstDateMonth = NSCalendar.current.date(from: components)
        return firstDateMonth!
    }


    //表記する日にちの取得 週のカレンダー
    func dateForCellAtIndexPathWeeks(row:Int,startDate:Date) -> Date{
        //始まりの日が週の何番目かを計算(日曜日が1) 指定した月の初日から数える
        let ordinalityOfFirstDay = NSCalendar.current.ordinality(of: .day, in: .weekOfMonth, for: firstDateOfMonth(date:startDate))
        let dateComponents = NSDateComponents()
        dateComponents.day = row - (ordinalityOfFirstDay! - 1)
        //計算して、基準の日から何日マイナス、加算するか dateComponents.day = -2 とか
        let date = NSCalendar.current.date(byAdding:dateComponents as DateComponents,to:firstDateOfMonth(date:startDate))
        return date!
    }


    //表記の変更 これをセルを作成する時に呼び出す
    func conversionDateFormat(row:Int,startDate:Date) -> String{
        let cellDate = dateForCellAtIndexPathWeeks(row: row,startDate:startDate)
        let formatter:DateFormatter = DateFormatter()
        formatter.dateFormat = "d"
        return formatter.string(from: cellDate)

    }

    //月日を返す
    func monthTag(row:Int,startDate:Date) -> String{
        let cellDate = dateForCellAtIndexPathWeeks(row: row,startDate:startDate)
        let formatter:DateFormatter = DateFormatter()
        formatter.dateFormat = "YM"
        return formatter.string(from:cellDate)
    }


}
見辛かったらごめんなさい(´・ω・`)
1つ1つのメソッドを見ていきます。
まずセルの総数を返すメソッドです。
    /*      指定した月から現在の月までのセルの数を返すメソッド
            引数 -> startDate 指定した月 カレンダーを始める月
            return -> セルの総数                              */
    func cellCount(startDate:Date) -> Int{
        //startDate(1番最初の日時)の年月を取り出す
        let startDateComponents = NSCalendar.current.dateComponents([.year ,.month], from:startDate)

        //currentDate(現在の日時)の年月を取り出す
        let currentDateComponents = NSCalendar.current.dateComponents([.year ,.month], from:selectedDate)

        //startDateとcurrentDateが何ヶ月離れているか fromとtoの差を取り出す
        let components = NSCalendar.current.dateComponents([.year,.month], from: startDateComponents, to: currentDateComponents)

        //startDateとcurrentDateが何ヶ月離れているか計算する
        let numberOfMonth = components.month! + components.year! * 12

        //1月ずつ何日あるか見ていく
        for i in 0 ..< numberOfMonth + 1{

            //monthをiに設定したdateComponentsを用意し、startDateからi月分足した日付(date)を取得する
            let dateComponents = NSDateComponents()
            dateComponents.month = i
            let date = NSCalendar.current.date(byAdding: dateComponents as DateComponents, to: startDate)

            //取得した月に何日あるかを取得 in(その月)にof(日)が何個あるか
            let dateRange = NSCalendar.current.range(of: .weekOfMonth, in: .month, for: date!)

            //月の初日が何曜日かを取得 日曜日==1
            let ordinalityOfFirstDay = NSCalendar.current.ordinality(of: .day, in: .weekOfMonth, for: firstDateOfMonth(date:date!))

            //その月の始まりが日曜日かどうかで場合分け
            if(ordinalityOfFirstDay == 1 || i == 0){
                numberOfItems = numberOfItems + dateRange!.count * daysPerWeek
            }else{
                numberOfItems = numberOfItems + (dateRange!.count - 1) * daysPerWeek
            }
        }
        //セルの総数を返す
        return numberOfItems
    }
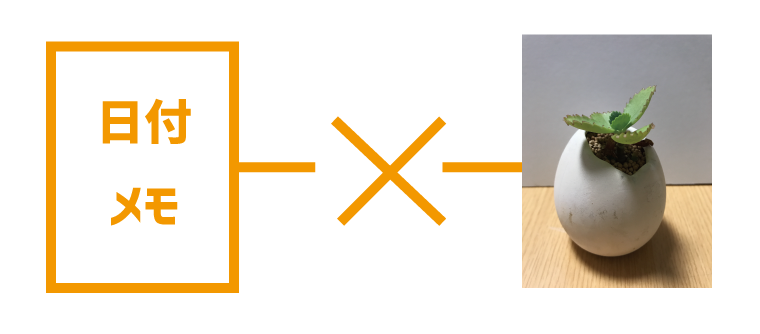
マーカーを引いた部分ですが、少し分かりづらいのでちょっと画像で説明すると

この判定を行なっています。
指定した月と現在の月が同じ場合(iが0のとき)はすべての週を表示します。
1週間ごとでなく、単純に日付の個数を数えてもいいかもしれません。
/*** この部分を削除して変更
            //取得した月に何日あるかを取得 in(その月)にof(日)が何個あるか
            let dateRange = NSCalendar.current.range(of: .weekOfMonth, in: .month, for: date!)

            //月の初日が何曜日かを取得 日曜日==1
            let ordinalityOfFirstDay = NSCalendar.current.ordinality(of: .day, in: .weekOfMonth, for: firstDateOfMonth(date:date!))

            //その月の始まりが日曜日かどうかで場合分け
            if(ordinalityOfFirstDay == 1 || i == 0){
                numberOfItems = numberOfItems + dateRange!.count * daysPerWeek
            }else{
                numberOfItems = numberOfItems + (dateRange!.count - 1) * daysPerWeek
            }
***/


            let dateRange = NSCalendar.current.range(of: .day, in: .month, for: date!)
            numberOfItems = numberOfItems + dateRange!.count
こうすると、一番最後の月(現在の月)の週最後に次の月の日付が表示されなくなります。
(11月30日が水曜日とすると、木曜日以降の12月1日2日3日の表示がされなくなる)
次に指定された月の初日を返すメソッドを見ていきます。
    /*      指定された月の初日を取得        */
    func firstDateOfMonth(date:Date) -> Date{
        //渡された日時から日にちを1にした日付を返す
        var components = NSCalendar.current.dateComponents([.year ,.month, .day], from:date)
        components.day = 1
        let firstDateMonth = NSCalendar.current.date(from: components)
        return firstDateMonth!
    }
2016年11月29日(date)を渡された場合は、2016年11月1日(firstDateMonth)を返すというメソッドです。
はい。
次に表記する日にちを取得するメソッドです。
    /*      表記する日にちの取得 週のカレンダー
            引数 row          ->  UICollectionViewのIndexPath.row
                 startDate    ->  指定した月 カレンダーを始める月
            return  date      ->  セルに入れる日付                  */
    func dateForCellAtIndexPathWeeks(row:Int,startDate:Date) -> Date{
        //始まりの日が週の何番目かを計算(日曜日が1) 指定した月の初日から数える
        let ordinalityOfFirstDay = NSCalendar.current.ordinality(of: .day, in: .weekOfMonth, for: firstDateOfMonth(date:startDate))
        let dateComponents = NSDateComponents()
        dateComponents.day = row - (ordinalityOfFirstDay! - 1)
        //計算して、基準の日から何日マイナス、加算するか dateComponents.day = -2 とか
        let date = NSCalendar.current.date(byAdding:dateComponents as DateComponents,to:firstDateOfMonth(date:startDate))
        return date!
    }
dateComponet.day の部分は
例えばカレンダーを始めた月が2016年11月とします。
row = 0 ordinalityOfFirstDay = 3 (11月1日が火曜日)のとき
dateComponent.day = 0 – (3 – 1) = -2となります。
この場合すべての基準の日付が2016年11月1日になり、そこから何日増えているかを計算して日付を取得しています。
-2でも、基準から-2日した日付(10月30日)が取得できます。
次にこの取得した日付をstring型に変換するメソッドを見ていきます。
    /*      表記の変更 これをセルを作成する時に呼び出す
            引数  row         -> UICollectionViewのIndexPath.row
                 startDate   -> 指定した月 カレンダーを始める月
            return  String   -> セルに入れる日付をString型にしたもの
    */
    func conversionDateFormat(row:Int,startDate:Date) -> String{
        let cellDate = dateForCellAtIndexPathWeeks(row: row,startDate:startDate)
        let formatter:DateFormatter = DateFormatter()
        formatter.dateFormat = "d"
        return formatter.string(from: cellDate)

    }
先ほどのメソッドを呼び出してDateFormatterで実際にカレンダーに入れるテキストを作成しています。
同様に、月日を返すメソッドも用意しておきます。
    func monthTag(row:Int,startDate:Date) -> String{
        let cellDate = dateForCellAtIndexPathWeeks(row: row,startDate:startDate)
        let formatter:DateFormatter = DateFormatter()
        formatter.dateFormat = "YM"
        return formatter.string(from:cellDate)
    }
これで日付を取得する準備ができました。
日付をCollectionViewに表示しよう
それではDateManagerに作成したメソッドを使用していきます。
UICollectionViewを設置したViewControllerを開きます。
まずはDateManagerを取得。
let dateManager = DateManager()これはViewController内に書いておけば楽かな・・・?
とりあえずViewController内に最初の月を書いておきます。
    let dateManager = DateManager()
    var startDate:Date!

    override func viewDidLoad() {
        super.viewDidLoad()
        //コレクションビューを設置していくよ
        /*    ~~~    */

        let date = Date()
        var components = NSCalendar.current.dateComponents([.year ,.month, .day], from:date)
        components.day = 1
        components.month = 10
        components.year = 2015
        startDate = NSCalendar.current.date(from: components)
    }
適当に現在より前の日付を設定しておきます。
セルの総数を書き直します。
    //セルの総数
    func collectionView(_ collectionView: UICollectionView, numberOfItemsInSection section: Int) -> Int {
        return dateManager.cellCount(startDate:startDate)
    }
セルの設定をしていきます。
    //セルの設定
    func collectionView(_ collectionView: UICollectionView, cellForItemAt indexPath: IndexPath) -> UICollectionViewCell {
        let cell:CalendarCell = collectionView.dequeueReusableCell(withReuseIdentifier:"collectCell",for:indexPath as IndexPath) as! CalendarCell

        //土曜日は赤 日曜日は青 にテキストカラーを変更する
        if(indexPath.row % 7 == 0){
            cell.textLabel.textColor = UIColor.red
        }else if(indexPath.row % 7 == 6){
            cell.textLabel.textColor = UIColor.blue
        }else{
            cell.textLabel.textColor = UIColor.gray
        }

        //セルの日付を取得し
        cell.textLabel.text = dateManager.conversionDateFormat(row:indexPath.row,startDate:startDate)


        return cell
    }
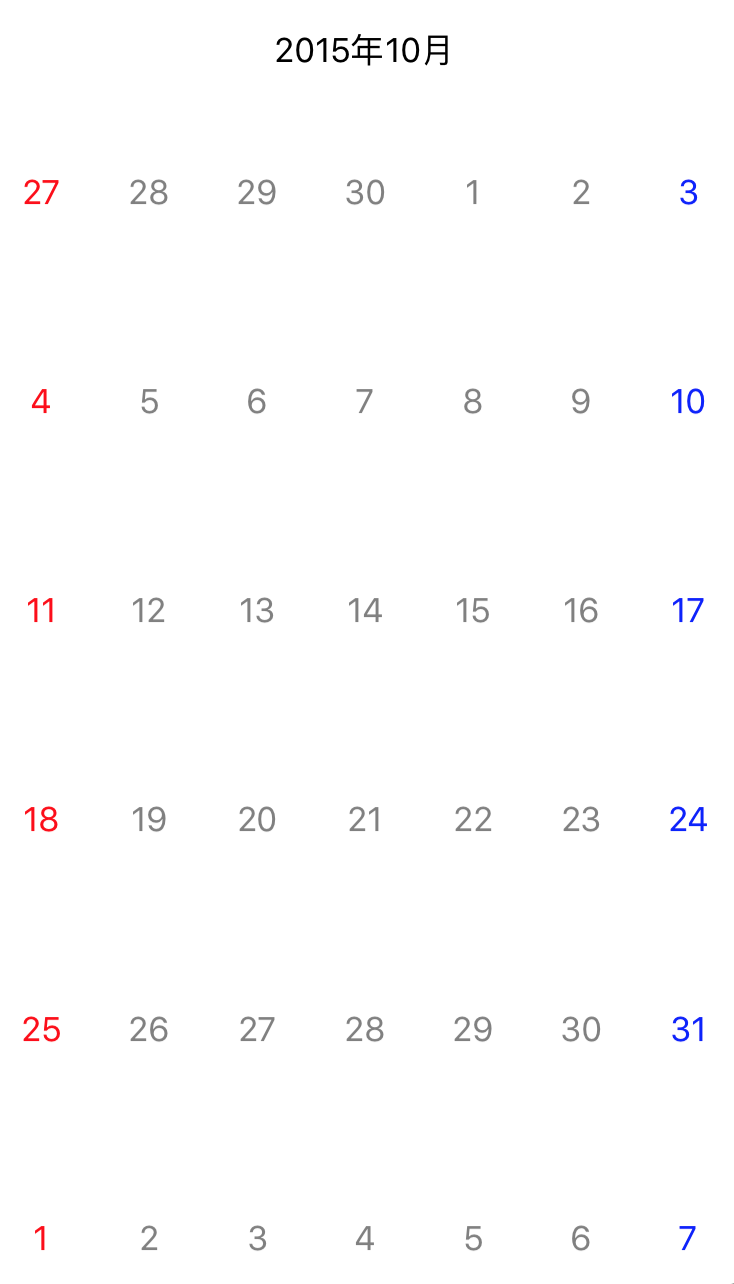
これでとりあえずカレンダーの見た目になりました!
しかしこのままでは今が何月かわかりません。
年月を表示しよう
まずは年月を表示するラベルを用意しておきます。
    //表示する年月のラベル
    private var monthLabel:UILabel!

    override func viewDidLoad() {
        super.viewDidLoad()
        let width = self.view.frame.width
        let height = self.view.frame.height
        /** ~~~ **/

        monthLabel = UILabel()
        monthLabel.frame = CGRect(x:0,y:0,width:width,height:100)
        monthLabel.center = CGPoint(x:width / 2,y:50)
        monthLabel.textAlignment = .center
        self.view.addSubview(monthLabel)
    }
cellにtagをつけます。
    //セルの設定
    func collectionView(_ collectionView: UICollectionView, cellForItemAt indexPath: IndexPath) -> UICollectionViewCell {
        let cell:CalendarCell = collectionView.dequeueReusableCell(withReuseIdentifier:"collectCell",for:indexPath as IndexPath) as! CalendarCell

        /**    ~~     **/

        cell.tag = Int(dateManager.monthTag(row:indexPath.row,startDate:startDate))!
        return cell
    }
これでcellには「201611」のような年と月がくっついた数字タグがつきました。
スクロールを監視して、現在表示されている日数が多い月の表示をするようにしていきます。
    func scrollViewDidScroll(_ scrollView: UIScrollView) {
        let visibleCell = myCollectView.visibleCells.filter{
            return myCollectView.bounds.contains($0.frame)
        }

        var visibleCellTag = Array<Int>()
        if(visibleCell != []){
            visibleCellTag = visibleCell.map{$0.tag}
            //月は奇数か偶数か 割り切れるものだけを取り出す
            let even = visibleCellTag.filter{
                return $0 % 2 == 0
            }
            let odd = visibleCellTag.filter{
                return $0 % 2 != 0
            }
            //oddかevenの多い方を返す
            let month = even.count >= odd.count ? even[0] : odd[0]

            //桁数によって分岐
            let digit = numberOfDigit(month: month)
            if(digit == 5){
                monthLabel.text = String(month / 10) + "年" + String(month % 10) + "月"
            }else if(digit == 6){
                monthLabel.text = String(month / 100) + "年" + String(month % 100) + "月"
            }
        }
    }

    func numberOfDigit(month:Int) -> Int{
        var num = month
        var cnt = 1
        while(num / 10 != 0){
            cnt = cnt + 1
            num = num / 10
        }
        return cnt

    }
まず
        let visibleCell = myCollectView.visibleCells.filter{
            return myCollectView.bounds.contains($0.frame)
        }
の部分で現在表示されているセルのうち、フレーム内に全ておさまっているセルを取得しています。
半分だけ表示されている、といったセルは取得されません。
この先は表示されているセルがない場合はクラッシュするので判定をしておきます。
さらにこの中からセルのタグを別の配列にしておきます。
var visibleCellTag = Array<Int>()
visibleCellTag = visibleCell.map{$0.tag}
1月2月3月と奇数偶数奇数・・・となっているのを利用して、現在どちらが多いかを判定していきます。
//月は奇数か偶数か 割り切れるものだけを取り出す
    let even = visibleCellTag.filter{
        return $0 % 2 == 0
    }
    let odd = visibleCellTag.filter{
        return $0 % 2 != 0
    }
    //多い方をmonthにいれる
    var month = even.count >= odd.count ? even[0] : odd[0]
1月と2月の間にいるときは、見えているのは1月または2月のはずなので、どちらか多い方を取り出してmonthにいれています。
そして桁数によって、String型に変換するときに何桁分を年にするか、月にするかを判定しています。
//桁数によって分岐
let digit = numberOfDigit(month: month)
if(digit == 5){
    monthLabel.text = String(month / 10) + "年" + String(month % 10) + "月"
}else if(digit == 6){
    monthLabel.text = String(month / 100) + "年" + String(month % 100) + "月"
}
numberOfDigit(month:Int)ではmonthが何桁かを取得しています。
スクロールすると月が変わるようになりますが、最初に表示する月が決められていないのでセルのindexPath.rowが6の位置の月を表示するようにしておきます。(0にすると前の月が表示される)
ラベルの部分を付け足します。
        let month:Int = Int(dateManager.monthTag(row:6,startDate:startDate))!
        let digit = numberOfDigit(month: month)

        monthLabel = UILabel()
        monthLabel.frame = CGRect(x:0,y:0,width:width,height:100)
        monthLabel.center = CGPoint(x:width / 2,y:50)
        monthLabel.textAlignment = .center

        if(digit == 5){
            monthLabel.text = String(month / 10) + "年" + String(month % 10) + "月"
        }else if(digit == 6){
            monthLabel.text = String(month / 100) + "年" + String(month % 100) + "月"
        }
        self.view.addSubview(monthLabel)
先ほどと同様に桁数で判定しています。
これでとりあえず連続カレンダー自体は完成です。
ここからはちょっとおまけ。
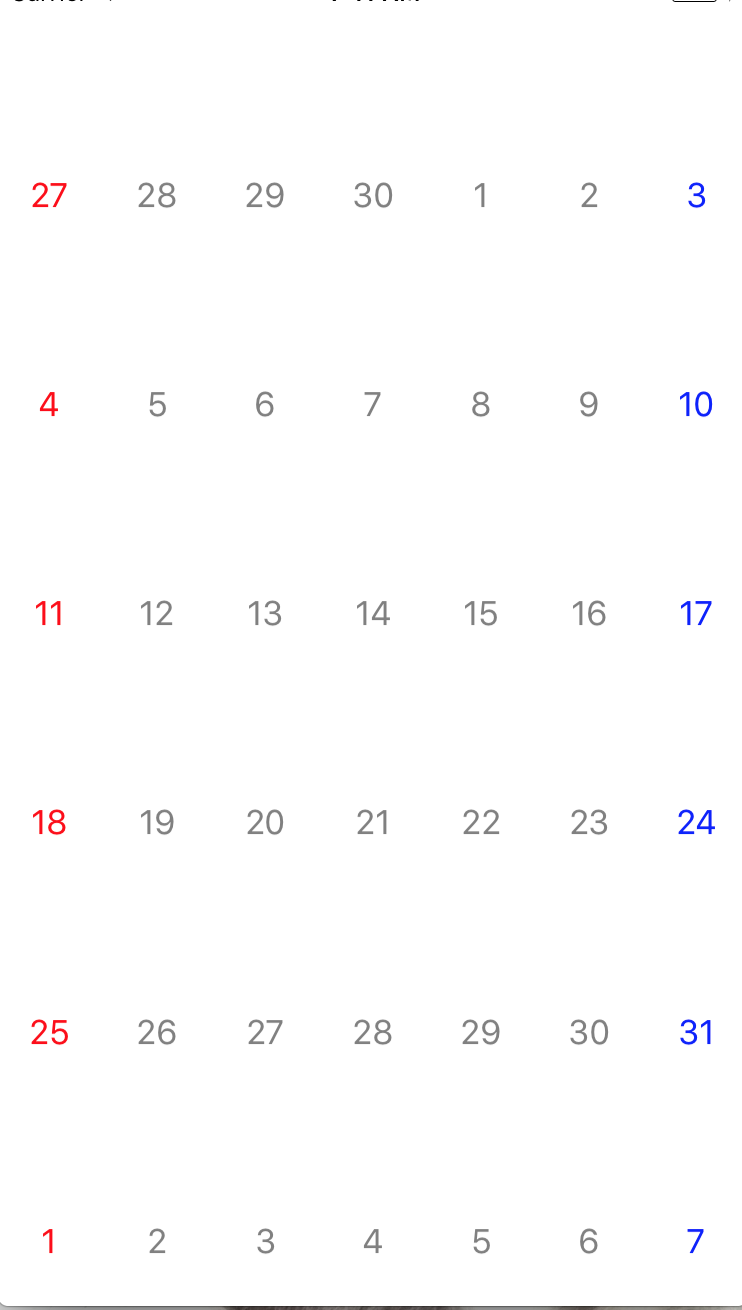
セルの上下左右決められた位置にだけ線を引こう
先ほどの画像では月の区切りが分かりづらいです。一番最初の動画のように線を引いていきます。
デフォルトの仕様ではborderを設定すると、上下左右全てに線が入ってしまいます。
「【Swift】UIViewの各辺を指定してborderをつけるExtension」
こちらの記事を参考にさせていただきました。
というかSwift3に対応させただけなんですけども。
extension UIView {

    enum BorderPosition {
        case Top
        case Right
        case Bottom
        case Left
    }

    func border(borderWidth: CGFloat, borderColor: UIColor?, borderRadius: CGFloat?) {
        self.layer.borderWidth = borderWidth
        self.layer.borderColor = borderColor?.cgColor
        if let _ = borderRadius {
            self.layer.cornerRadius = borderRadius!
        }
        self.layer.masksToBounds = true
    }

    func border(positions: [BorderPosition], borderWidth: CGFloat, borderColor: UIColor?) {

        let topLine = CALayer()
        let leftLine = CALayer()
        let bottomLine = CALayer()
        let rightLine = CALayer()

        self.layer.sublayers = nil
        self.layer.masksToBounds = true

        if let _ = borderColor {
            topLine.backgroundColor = borderColor!.cgColor
            leftLine.backgroundColor = borderColor!.cgColor
            bottomLine.backgroundColor = borderColor!.cgColor
            rightLine.backgroundColor = borderColor!.cgColor
        } else {
            topLine.backgroundColor = UIColor.white.cgColor
            leftLine.backgroundColor = UIColor.white.cgColor
            bottomLine.backgroundColor = UIColor.white.cgColor
            rightLine.backgroundColor = UIColor.white.cgColor
        }

        if positions.contains(.Top) {
            topLine.frame = CGRect(x:0.0, y:0.0, width:self.frame.width, height:borderWidth)
            self.layer.addSublayer(topLine)
        }
        if positions.contains(.Left) {
            leftLine.frame = CGRect(x:0.0,y: 0.0, width:borderWidth,height: self.frame.height)
            self.layer.addSublayer(leftLine)
        }
        if positions.contains(.Bottom) {
            bottomLine.frame = CGRect(x:0.0,y: self.frame.height - borderWidth, width:self.frame.width, height:borderWidth)
            self.layer.addSublayer(bottomLine)
        }
        if positions.contains(.Right) {
            rightLine.frame = CGRect(x:self.frame.width - borderWidth, y:0.0,width: borderWidth, height:self.frame.height)
            self.layer.addSublayer(rightLine)
        }

    }

    @IBInspectable
    var borderWidth: CGFloat {
        get {
            return self.layer.borderWidth
        }
        set {
            self.layer.borderWidth = newValue
        }
    }

    @IBInspectable
    var borderColor: UIColor? {
        get {
            if let _ = self.layer.borderColor {
                return UIColor(cgColor: self.layer.borderColor!)
            }
            return nil
        }
        set {
            self.layer.borderColor = newValue?.cgColor
        }
    }

    @IBInspectable
    var cornerRadius: CGFloat {
        get {
            return self.layer.cornerRadius
        }
        set {
            self.layer.cornerRadius = newValue
        }
    }

}

class ViewController:UIViewController ,UICollectionViewDelegate,UICollectionViewDataSource,UICollectionViewDelegateFlowLayout{

/** ~~ **/

}
こちらをCollectionViewを設置したViewControllerに追加します。
セルにborderをつけます。
    //セルの設定
    func collectionView(_ collectionView: UICollectionView, cellForItemAt indexPath: IndexPath) -> UICollectionViewCell {
        let cell:CalendarCell = collectionView.dequeueReusableCell(withReuseIdentifier:"collectCell",for:indexPath as IndexPath) as! CalendarCell

        /** ~~~ **//

        //セルの日付を取得
        let day = Int(dateManager.conversionDateFormat(row:indexPath.row,albumStartDate:albumStartDate!))!
        if(day == 1){
            cell.textLabel.border(positions:[.Top,.Left],borderWidth:1,borderColor:UIColor.black)
        }else if(day <= 7){
            cell.textLabel.border(positions:[.Top],borderWidth:1,borderColor:UIColor.black)
        }else{
            cell.textLabel.border(positions:[.Top],borderWidth:0,borderColor:UIColor.white)
        }

        return cell
    }
このとき、枠線を引かない時(else部分)を追加していないと大変なことになります・・・・。
セルを再利用しているので、枠線が再利用され場所でもそのまま表示されてしまいます。
1日は上左に、2~7日は上にのみ枠線を表示する設定にするとちょうど区切りができます。
起動時に現在の月を表示する
これは実はちょっとあんまりうまくいってないんですけど、無理矢理解決させたのでちょこっと書いておきますね。
このカレンダーの場合、1番下が現在の月になっています。
なので、とりあえず起動時に1番下までスクロールして現在の月を表示するようにしてみました。
    override func viewDidAppear(_ animated: Bool){
        myCollectView.setContentOffset(CGPoint(x:0,y:self.myCollectView.contentSize.height - self.myCollectView.frame.size.height), animated: false)
    }
githubとかにコードあげたほうが本当はいいんでしょうけど、まだ使い方がわかってないのでとりあえずそのまま全体コードもここに書いておきます。
全体コード
ViewController.swift
import UIKit
extension UIView {

    enum BorderPosition {
        case Top
        case Right
        case Bottom
        case Left
    }

    func border(borderWidth: CGFloat, borderColor: UIColor?, borderRadius: CGFloat?) {
        self.layer.borderWidth = borderWidth
        self.layer.borderColor = borderColor?.cgColor
        if let _ = borderRadius {
            self.layer.cornerRadius = borderRadius!
        }
        self.layer.masksToBounds = true
    }

    func border(positions: [BorderPosition], borderWidth: CGFloat, borderColor: UIColor?) {

        let topLine = CALayer()
        let leftLine = CALayer()
        let bottomLine = CALayer()
        let rightLine = CALayer()

        self.layer.sublayers = nil
        self.layer.masksToBounds = true

        if let _ = borderColor {
            topLine.backgroundColor = borderColor!.cgColor
            leftLine.backgroundColor = borderColor!.cgColor
            bottomLine.backgroundColor = borderColor!.cgColor
            rightLine.backgroundColor = borderColor!.cgColor
        } else {
            topLine.backgroundColor = UIColor.white.cgColor
            leftLine.backgroundColor = UIColor.white.cgColor
            bottomLine.backgroundColor = UIColor.white.cgColor
            rightLine.backgroundColor = UIColor.white.cgColor
        }

        if positions.contains(.Top) {
            topLine.frame = CGRect(x:0.0, y:0.0, width:self.frame.width, height:borderWidth)
            self.layer.addSublayer(topLine)
        }
        if positions.contains(.Left) {
            leftLine.frame = CGRect(x:0.0,y: 0.0, width:borderWidth,height: self.frame.height)
            self.layer.addSublayer(leftLine)
        }
        if positions.contains(.Bottom) {
            bottomLine.frame = CGRect(x:0.0,y: self.frame.height - borderWidth, width:self.frame.width, height:borderWidth)
            self.layer.addSublayer(bottomLine)
        }
        if positions.contains(.Right) {
            rightLine.frame = CGRect(x:self.frame.width - borderWidth, y:0.0,width: borderWidth, height:self.frame.height)
            self.layer.addSublayer(rightLine)
        }

    }

    @IBInspectable
    var borderWidth: CGFloat {
        get {
            return self.layer.borderWidth
        }
        set {
            self.layer.borderWidth = newValue
        }
    }

    @IBInspectable
    var borderColor: UIColor? {
        get {
            if let _ = self.layer.borderColor {
                return UIColor(cgColor: self.layer.borderColor!)
            }
            return nil
        }
        set {
            self.layer.borderColor = newValue?.cgColor
        }
    }

    @IBInspectable
    var cornerRadius: CGFloat {
        get {
            return self.layer.cornerRadius
        }
        set {
            self.layer.cornerRadius = newValue
        }
    }

}

class ViewController: UIViewController ,UICollectionViewDelegate,UICollectionViewDataSource,UICollectionViewDelegateFlowLayout{

    private var myCollectView:UICollectionView!
    //セルの余白
    let cellMargin:CGFloat = 2.0
    //1週間に何日あるか(行数)
    let daysPerWeek:Int = 7
    let dateManager = DateManager()
    var startDate:Date!
    private var monthLabel:UILabel!

    override func viewDidLoad() {
        super.viewDidLoad()

        let barHeight = UIApplication.shared.statusBarFrame.size.height
        let width = self.view.frame.width
        let height = self.view.frame.height
        let layout = UICollectionViewFlowLayout()
        layout.sectionInset = UIEdgeInsetsMake(0,0,0,0)

        //コレクションビューを設置していくよ
        myCollectView = UICollectionView(frame: self.view.frame, collectionViewLayout: layout)
        myCollectView.frame = CGRect(x:0,y:barHeight + 50,width:width,height:height - barHeight - 50)
        myCollectView.register(CalendarCell.self, forCellWithReuseIdentifier: "collectCell")
        myCollectView.delegate = self
        myCollectView.dataSource = self
        myCollectView.backgroundColor = .white

        self.view.addSubview(myCollectView)

        let date = Date()
        var components = NSCalendar.current.dateComponents([.year ,.month, .day], from:date)
        components.day = 1
        components.month = 10
        components.year = 2015
        startDate = NSCalendar.current.date(from: components)

        let month:Int = Int(dateManager.monthTag(row:6,startDate:startDate))!
        let digit = numberOfDigit(month: month)

        monthLabel = UILabel()
        monthLabel.frame = CGRect(x:0,y:0,width:width,height:100)
        monthLabel.center = CGPoint(x:width / 2,y:50)
        monthLabel.textAlignment = .center

        if(digit == 5){
            monthLabel.text = String(month / 10) + "年" + String(month % 10) + "月"
        }else if(digit == 6){
            monthLabel.text = String(month / 100) + "年" + String(month % 100) + "月"
        }
        self.view.addSubview(monthLabel)
    }

    override func viewDidAppear(_ animated: Bool){
        myCollectView.setContentOffset(CGPoint(x:0,y:self.myCollectView.contentSize.height - self.myCollectView.frame.size.height), animated: false)
    }

    func collectionView(_ collectionView:UICollectionView,layout collectionViewLayout:UICollectionViewLayout,minimumLineSpacingForSectionAt section:Int) -> CGFloat{
        return cellMargin
    }

    func collectionView(_ collectionView:UICollectionView,layout collectionViewLayout:UICollectionViewLayout,minimumInteritemSpacingForSectionAt section:Int) -> CGFloat{
        return cellMargin
    }
    //セクションの数
    func numberOfSections(in collectionView: UICollectionView) -> Int {
        return 1
    }

    //セルのサイズを設定
    func collectionView(_ collectionView:UICollectionView,layout collectionViewLayout:UICollectionViewLayout,sizeForItemAt indexPath:IndexPath) -> CGSize{
        let numberOfMargin:CGFloat = 8.0
        let width:CGFloat = (collectionView.frame.size.width - cellMargin * numberOfMargin) / CGFloat(daysPerWeek)
        let height:CGFloat = width * 2.0
        return CGSize(width:width,height:height)
    }

    //選択した時
    func collectionView(_ collectionView: UICollectionView, didSelectItemAt indexPath: IndexPath) {

    }

    //セルの総数
    func collectionView(_ collectionView: UICollectionView, numberOfItemsInSection section: Int) -> Int {
        return dateManager.cellCount(startDate:startDate)
    }

    //セルの設定
    func collectionView(_ collectionView: UICollectionView, cellForItemAt indexPath: IndexPath) -> UICollectionViewCell {
        let cell:CalendarCell = collectionView.dequeueReusableCell(withReuseIdentifier:"collectCell",for:indexPath as IndexPath) as! CalendarCell

        //土曜日は赤 日曜日は青 にテキストカラーを変更する
        if(indexPath.row % 7 == 0){
            cell.textLabel.textColor = UIColor.red
        }else if(indexPath.row % 7 == 6){
            cell.textLabel.textColor = UIColor.blue
        }else{
            cell.textLabel.textColor = UIColor.gray
        }
        cell.tag = Int(dateManager.monthTag(row:indexPath.row,startDate:startDate))!
        //セルの日付を取得し
        cell.textLabel.text = dateManager.conversionDateFormat(row:indexPath.row,startDate:startDate)

        //セルの日付を取得
        let day = Int(dateManager.conversionDateFormat(row:indexPath.row,startDate:startDate!))!
        if(day == 1){
            cell.textLabel.border(positions:[.Top,.Left],borderWidth:1,borderColor:UIColor.black)
        }else if(day <= 7){
            cell.textLabel.border(positions:[.Top],borderWidth:1,borderColor:UIColor.black)
        }else{
            cell.textLabel.border(positions:[.Top],borderWidth:0,borderColor:UIColor.white)
        }
        return cell
    }

    func scrollViewDidScroll(_ scrollView: UIScrollView) {
        let visibleCell = myCollectView.visibleCells.filter{
            return myCollectView.bounds.contains($0.frame)
        }

        var visibleCellTag = Array<Int>()
        if(visibleCell != []){
            visibleCellTag = visibleCell.map{$0.tag}
            //月は奇数か偶数か 割り切れるものだけを取り出す
            let even = visibleCellTag.filter{
                return $0 % 2 == 0
            }
            let odd = visibleCellTag.filter{
                return $0 % 2 != 0
            }
            //oddかevenの多い方を返す
            let month = even.count >= odd.count ? even[0] : odd[0]

            //桁数によって分岐
            let digit = numberOfDigit(month: month)
            if(digit == 5){
                monthLabel.text = String(month / 10) + "年" + String(month % 10) + "月"
            }else if(digit == 6){
                monthLabel.text = String(month / 100) + "年" + String(month % 100) + "月"
            }
        }
    }

    func numberOfDigit(month:Int) -> Int{
        var num = month
        var cnt = 1
        while(num / 10 != 0){
            cnt = cnt + 1
            num = num / 10
        }
        return cnt

    }
    override func didReceiveMemoryWarning() {
        super.didReceiveMemoryWarning()
        // Dispose of any resources that can be recreated.
    }


}
DateManager.swift
import UIKit

class DateManager: NSDate {

    //現在の日付
    private var selectedDate = Date()

    //1週間に何日あるか
    private let daysPerWeek:Int = 7

    //セルの個数(nilが入らないようにする)
    private var numberOfItems:Int = 0

    /*      指定した月から現在の月までのセルの数を返すメソッド
            引数 -> startDate 指定した月 カレンダーを始める月
            return -> セルの総数                              */
    func cellCount(startDate:Date) -> Int{
        //startDate(1番最初の日時)の年月を取り出す
        let startDateComponents = NSCalendar.current.dateComponents([.year ,.month], from:startDate as Date)

        //currentDate(現在の日時)の年月を取り出す
        let currentDateComponents = NSCalendar.current.dateComponents([.year ,.month], from:selectedDate as Date)

        //startDateとcurrentDateが何ヶ月離れているか fromとtoの差を取り出す
        let components = NSCalendar.current.dateComponents([.year,.month], from: startDateComponents, to: currentDateComponents)

        //startDateとcurrentDateが何ヶ月離れているか計算する
        let numberOfMonth = components.month! + components.year! * 12

        //1月ずつ何日あるか見ていく
        for i in 0 ..< numberOfMonth + 1{

            //monthをiに設定したdateComponentsを用意し、startDateからi月分足した日付(date)を取得する
            let dateComponents = NSDateComponents()
            dateComponents.month = i
            let date = NSCalendar.current.date(byAdding: dateComponents as DateComponents, to: startDate)

            //取得した月に週がいくつあるかを取得 in(その月)にof(週)が何個あるか
            let dateRange = NSCalendar.current.range(of: .weekOfMonth, in: .month, for: date!)

            //月の初日が何曜日かを取得 日曜日==1
            let ordinalityOfFirstDay = NSCalendar.current.ordinality(of: .day, in: .weekOfMonth, for: firstDateOfMonth(date:date!))

            //その月の始まりが日曜日かどうかで場合分け
            if(ordinalityOfFirstDay == 1 || i == 0){
                numberOfItems = numberOfItems + dateRange!.count * daysPerWeek
            }else{
                numberOfItems = numberOfItems + (dateRange!.count - 1) * daysPerWeek
            }
        }
        //セルの総数を返す
        return numberOfItems
    }


    /*      指定された月の初日を取得        */
    func firstDateOfMonth(date:Date) -> Date{
        //渡された日時から日にちを1にした日付を返す
        var components = NSCalendar.current.dateComponents([.year ,.month, .day], from:date)
        components.day = 1
        let firstDateMonth = NSCalendar.current.date(from: components)
        return firstDateMonth!
    }


    /*      表記する日にちの取得 週のカレンダー
            引数 row          ->  UICollectionViewのIndexPath.row
                 startDate    ->  指定した月 カレンダーを始める月
            return  date      ->  セルに入れる日付                  */
    func dateForCellAtIndexPathWeeks(row:Int,startDate:Date) -> Date{
        //始まりの日が週の何番目かを計算(日曜日が1) 指定した月の初日から数える
        let ordinalityOfFirstDay = NSCalendar.current.ordinality(of: .day, in: .weekOfMonth, for: firstDateOfMonth(date:startDate))
        let dateComponents = NSDateComponents()
        dateComponents.day = row - (ordinalityOfFirstDay! - 1)
        //計算して、基準の日から何日マイナス、加算するか dateComponents.day = -2 とか
        let date = NSCalendar.current.date(byAdding:dateComponents as DateComponents,to:firstDateOfMonth(date:startDate))
        return date!
    }


    /*      表記の変更 これをセルを作成する時に呼び出す
            引数  row         -> UICollectionViewのIndexPath.row
                 startDate   -> 指定した月 カレンダーを始める月
            return  String   -> セルに入れる日付をString型にしたもの
    */
    func conversionDateFormat(row:Int,startDate:Date) -> String{
        let cellDate = dateForCellAtIndexPathWeeks(row: row,startDate:startDate)
        let formatter:DateFormatter = DateFormatter()
        formatter.dateFormat = "d"
        return formatter.string(from: cellDate)

    }


    //月を返す
    func monthTag(row:Int,startDate:Date) -> String{
        let cellDate = dateForCellAtIndexPathWeeks(row: row,startDate:startDate)
        let formatter:DateFormatter = DateFormatter()
        formatter.dateFormat = "YM"
        return formatter.string(from:cellDate)
    }


}
CalendarCell.swift
import UIKit

class CalendarCell: UICollectionViewCell {
    public var textLabel:UILabel!

    required init(coder aDecoder:NSCoder){
        super.init(coder: aDecoder)!
    }

    override init(frame:CGRect){
        super.init(frame:frame)
        //UILabelを生成
        textLabel = UILabel()
        textLabel.frame = CGRect(x:0,y:0,width:self.frame.width,height:self.frame.height)
        textLabel.textAlignment = .center

        self.contentView.addSubview(textLabel!)

    }
}
コメントつけたままでちょっと邪魔かもしれませんがこのままで失礼します。
単純に書き方の問題だったり、改善法だったりありましたら教えていただけると嬉しいです。
ではでは
その他にもたくさんの記事を参考にさせていただきましたが、ちょっとあらゆるところで調べててどの記事だったかもわからなくなってしまっていました。すみません。


Comments...
コメント時の注意
「Twitter」「Facebook」「Google+」「WordPress」のいずれかのアカウントをお持ちの方は各アカウントと連携することでコメントできます。 コメントしたことはSNSに流れませんので、アカウントをお持ちの方はこちらの方法でコメントを投稿して下さると嬉しいです。 アカウントをお持ちでない方はメールアドレスで投稿することができます。 初回コメント時は承認後に表示されます。